BMWdiy.INFO
E39 1997 540iA ECU Removal

Prepared by VietSB
Modified 10.27.02


NOTE: Perform these steps at your own risk. All P/N's listed are a "best guess", so please double-check with your local dealer. These mods and repairs were performed on my US-spec 1997 540iA (11/96 prod date, M62 engine) but there is no guarantee they will work on other E39's. These instructions are provided for entertainment purposes only!


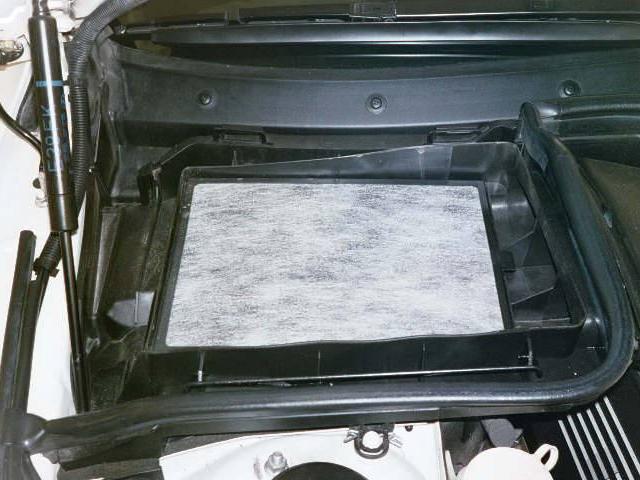
BACKGROUND: In preparation for my supercharger install, I needed to send my ECU off for reprogramming, so I documented the steps. Also, Steps 3-4 show how easy it is to access the cabin ventilation microfilter element.
Required Tools:

Recommended Tools:


1. Turn the car off and remove the key. Disconnecting the battery might be a good precaution as well (which I didn't do).
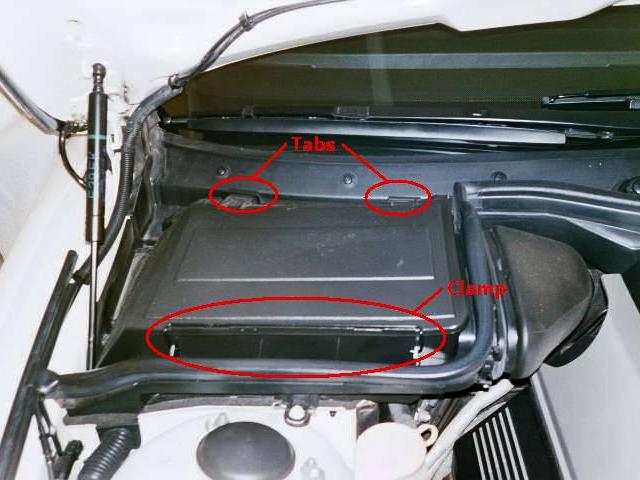
2. The ECU is located in the engine compartment, underneath the passenger-side microfilter housing (cabin air duct intake). Open the hood and examine the area.
3. Swing the clamp forward and remove the housing cover by lifting up and pulling towards the front of the car to clear the two tabs at the rear of the lid.


4. Picture of the cabin ventilation microfilter element.


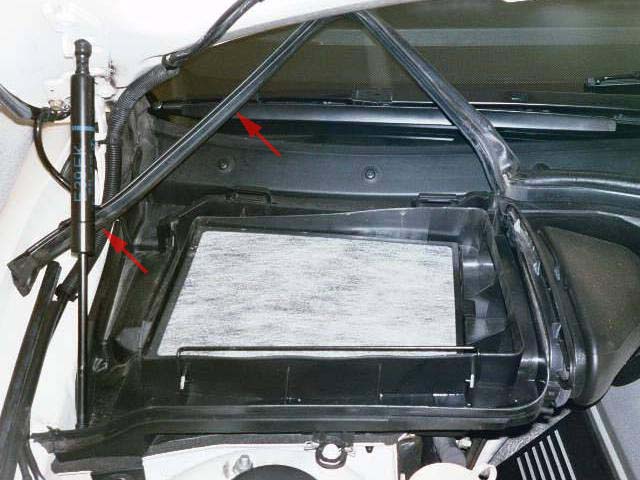
5. Lift the weather-stripping off the edge of the microfilter housing.


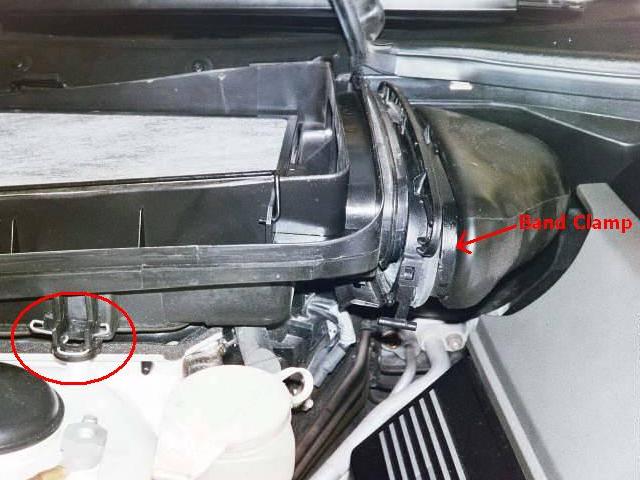
6. Carefully unclip the band clamp leading to the air duct. 1998+ E39's might have a different and easier clamping mechanism. Compress the spring-loaded front clip to release the housing from the threaded bolt and lift the microfilter housing straight up and out.


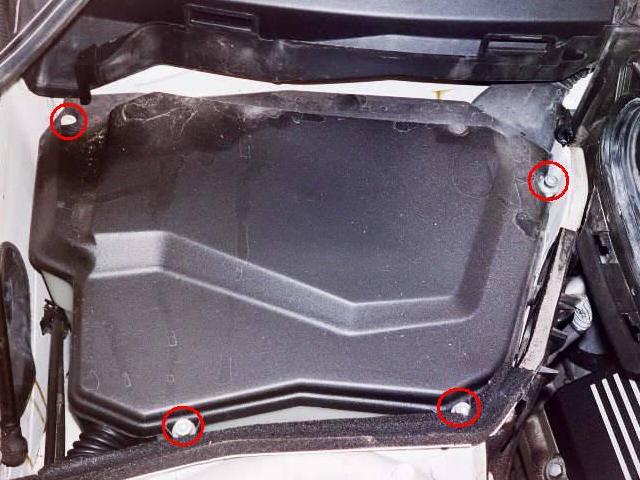
7. Remove the (4) 5mm hex bolts and lift off the ECU compartment cover. Be careful not to let a bolt drop down the side. Don't ask me how I know... I've read a few articles describing how these hex bolts might not release properly or how the nut might strip and spin in place. Check the bimmer.org archives for advice if you encounter this problem. As a precaution, do not over-tighten these bolts when reinstalling the ECU.


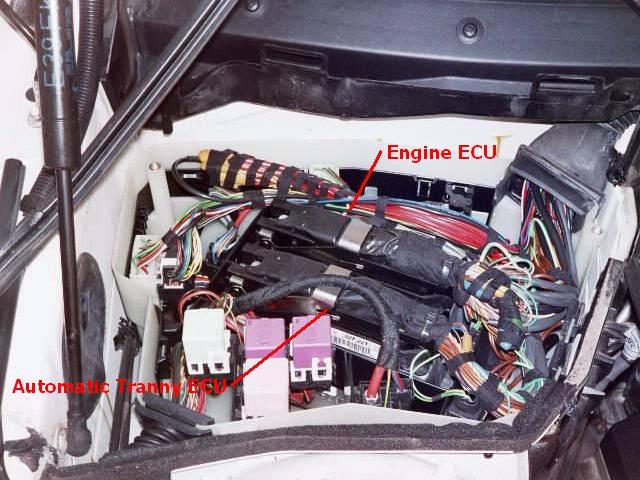
8. A picture of the ECU compartment. This is for a 1997 540iA, so you'll notice two computers with black wiring harnesses. One is the automatic transmission ECU and the other is the engine ECU.


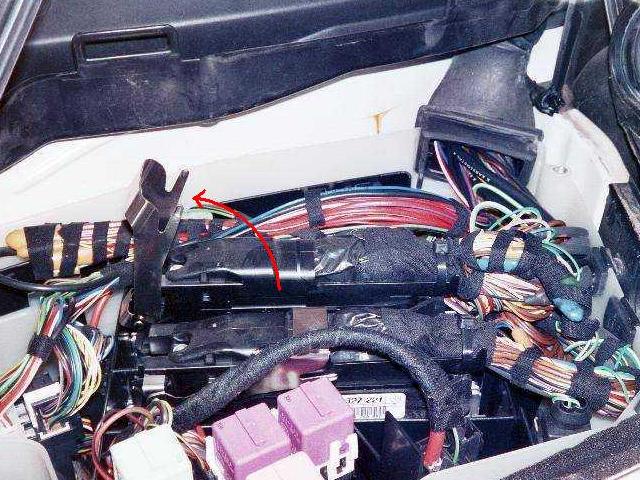
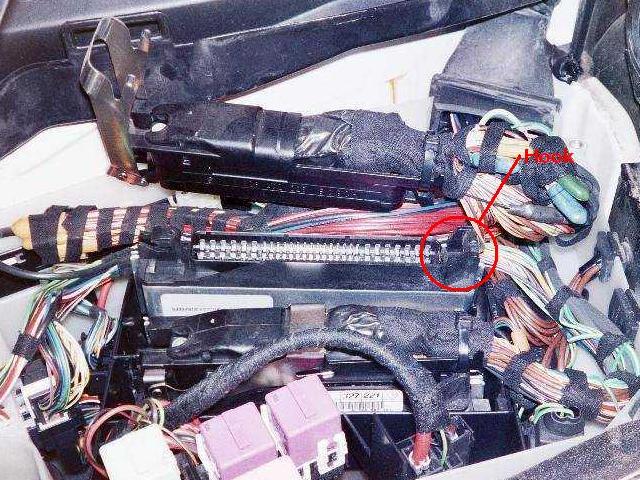
9. Locate the correct ECU and remove the wiring harness by lifting the metal release arm (Pic 1). The harness has a hook on the right side (Pic 2) that needs to be maneuvered out of as well. I heard from a 1998 540i/6 owner that instead of a release arm, their ECU had a number of individual wiring harnesses plugged directly into the top of the ECU which required a decent amount of force to unplug. If in doubt, have a qualified mechanic perform these steps.


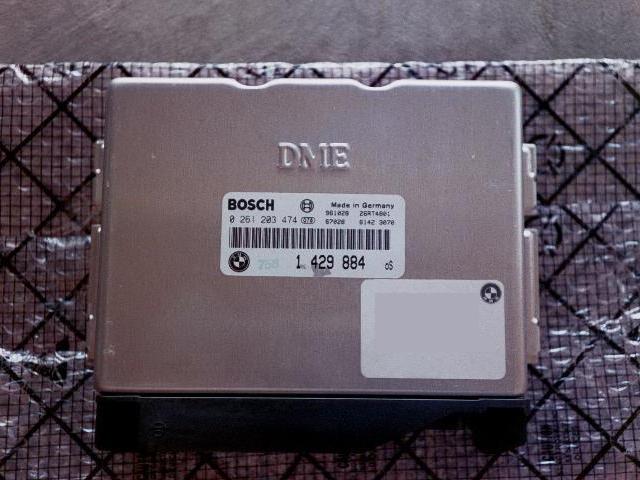
10. Pull the ECU straight up and out. If it's similar to my 1997, there should be the word "DME" stamped on the front. Mine also had my VIN number (censored) printed on the bottom right sticker. Protect the ECU from static electricity at all times.


Questions? Comments? E-mail me: .

Click Here to return to the Main Menu.


Optimized for 800x600 or higher resolution.

Copyright © Midnight Designs, 2002-2003. All Rights Reserved. All images and registered trademarks are used to benefit and without intent to infringe on the holder. Contents Subject to Change Without Notice.