BMWdiy.INFO
E39 Non-CELIS Head Light
Removal & Lens Cover Replacement
Prepared by VietSB
Modified 04.04.03
NOTE: Perform these steps at your own risk. All P/N's listed are a "best guess", so please double-check with your local dealer. These mods and repairs were performed on my US-spec 1997 540iA (11/96 prod date, M62 engine) but there is no guarantee they will work on other E39's. These instructions are provided for entertainment purposes only!
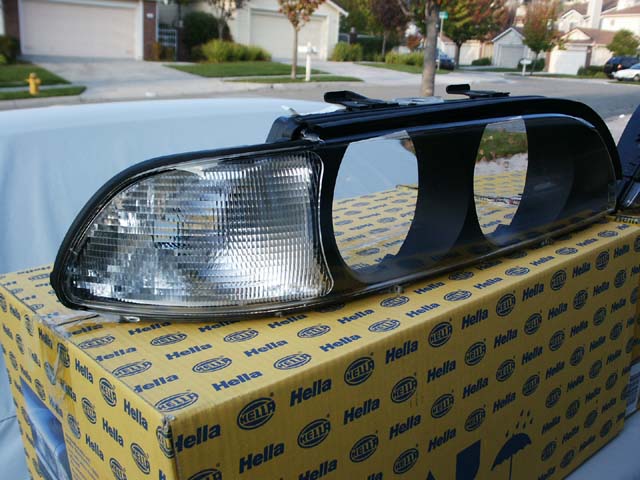
BACKGROUND: The first half of this DIY covers the removal process for Halogen non-CELIS (non-"Angel Eye") head light assemblies which were OEM on 1997-2000 E39's. The removal process for 2001+ CELIS assemblies is similar and more info can be found by reversing the steps found in the CELIS Head Light Install DIY. Removal of the Xenon non-CELIS assemblies should be fairly similar. The second half covers the simple removal of the front lens which is desirable to replace the easily-pitted plastic lenses, or to upgrade from amber-corner to smoked or clear-corner lenses. Lens removal on newer CELIS assemblies is not recommended because they are bonded with a strong plastic cement.
Required Parts:
- (Optional) Smoke or clear-corner lens covers - Hella preferred
Required Tools:
- Ratchet, extension, 8mm socket
- X-Acto® knife
- Flat-head screwdriver
- Needle-nose pliers
Recommend Tools:
- Rubber gloves
- Magnetic pick-up tool and flashlight in case of an "incident"
- Glass cleaner and shop rags
1. Park against a wall and use masking tape to mark the approximate focus point of the low beams for future reference.
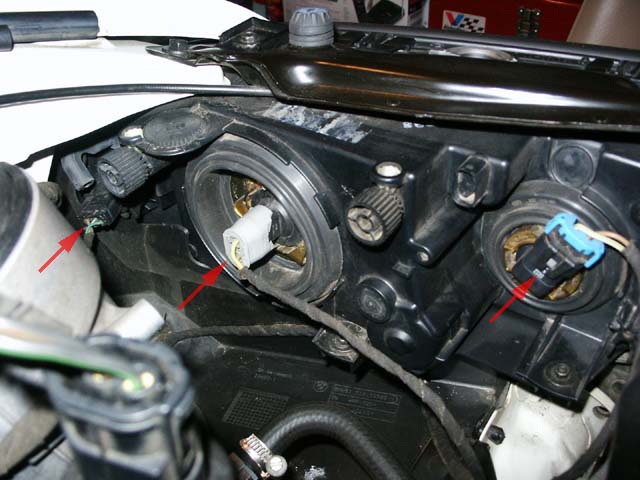
2. Unplug the low-beam, high-beam, and combined turn-signal/parking light connectors. Xenon assemblies also have a self-leveling motor connector as well as a slightly different low-beam connection point into the ballast (not pictured).
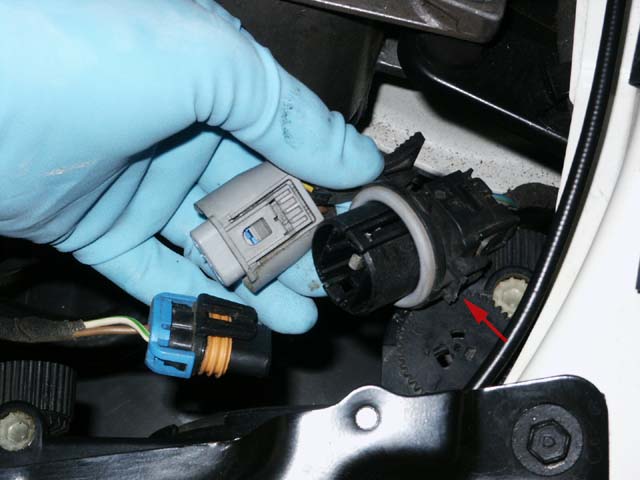
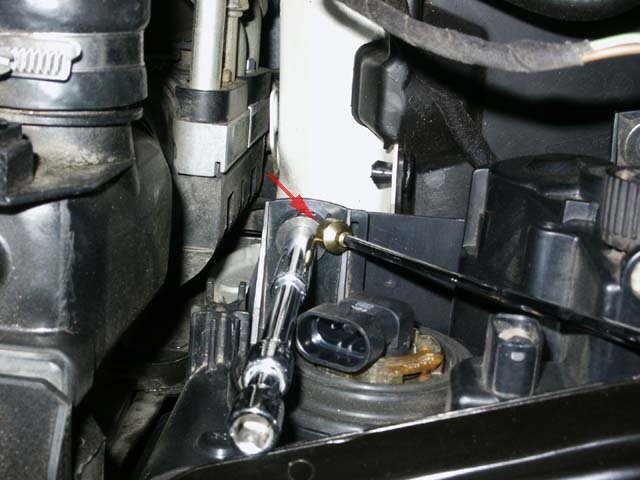
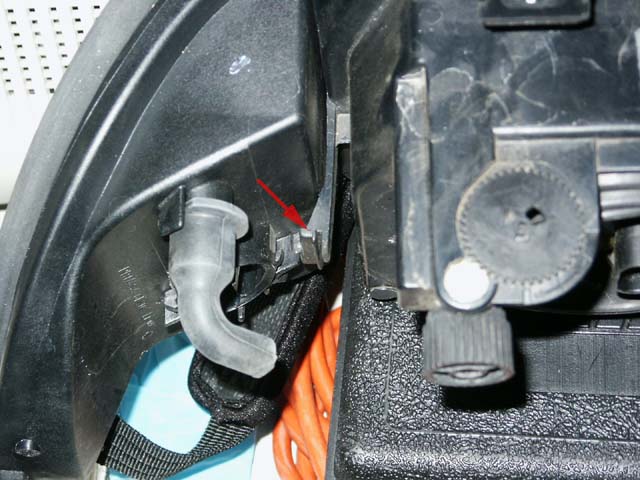
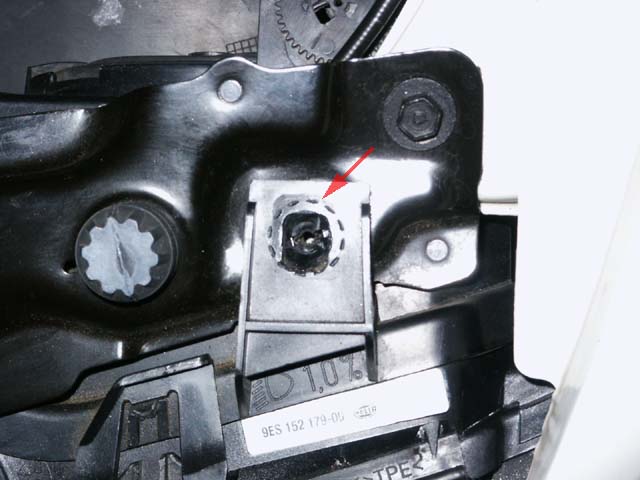
The connectors should look like this. Please Note: If you accidentally remove the turn-signal/parking light socket instead of just the connector, you might notice the mounting arms are fragile and could snap off as one did on mine (see red arrow).
3. Carefully remove the (4) 8mm mounting screws. Make note that the upper screws have serrated washers and the bottom screws have flat washers.
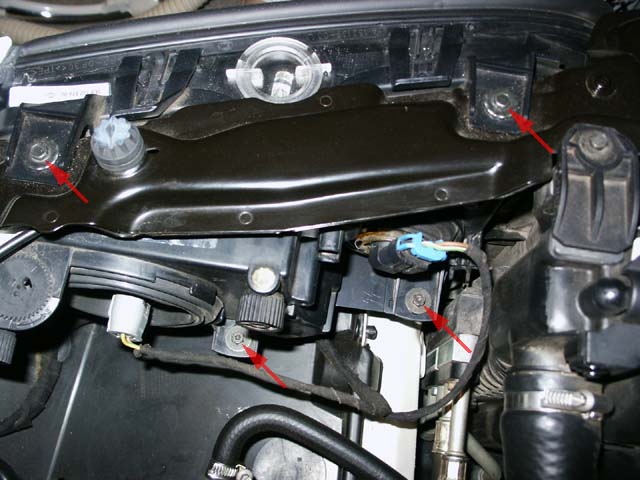
Use the magnetic pick-up tool to help retrieve the lower screws as they can easily drop down below.
4. Pivot the inner edge of the assembly outwards. Take care to protect the bumper while doing so.
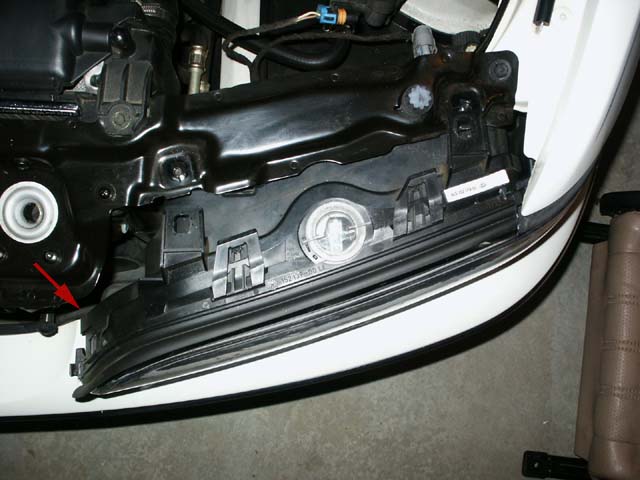
5. The outer connection point should release and the assembly can be carefully slid out forwards.
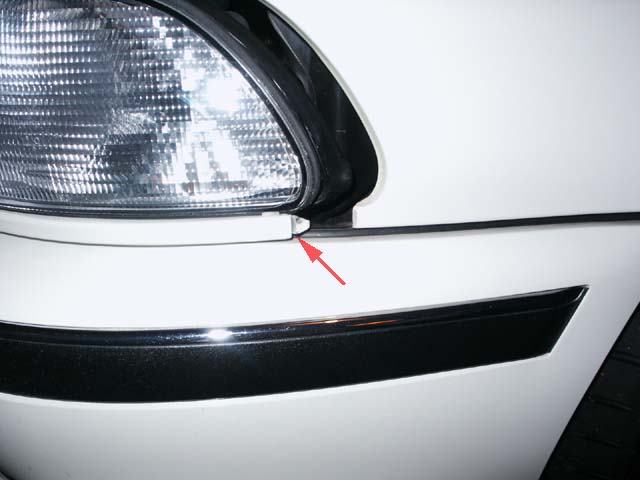
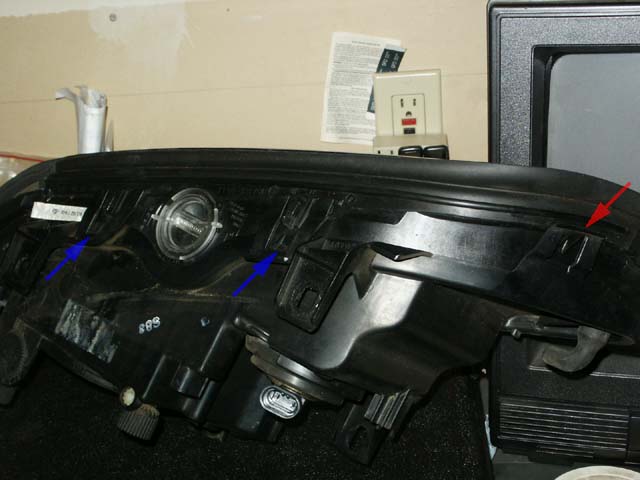
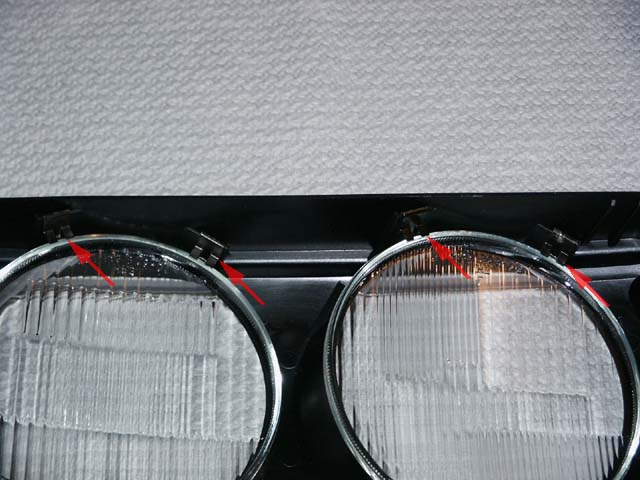
6. The painted strip can be removed by prying up slightly and clearing the (2) tabs (see red arrows). At the same time, the hook on the edge must be released (see blue arrow and inset pic). The hook is fragile and breaks easily, so use care when removing.
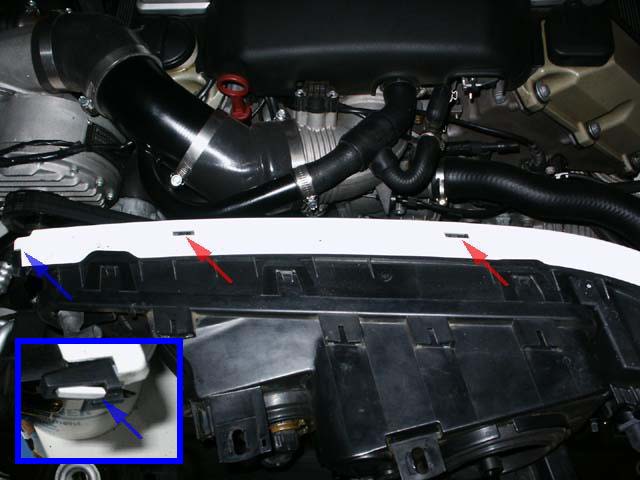
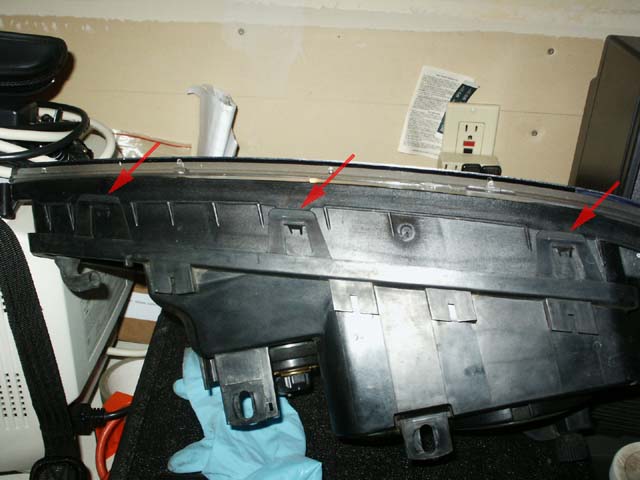
7. Score and break the (2) top latches which are plastic-welded (see blue arrows). Release the inner side latch (see red arrow).
8. Release the (3) bottom latches.
9. Release the outer side latch.
10. Carefully separate the two halves.
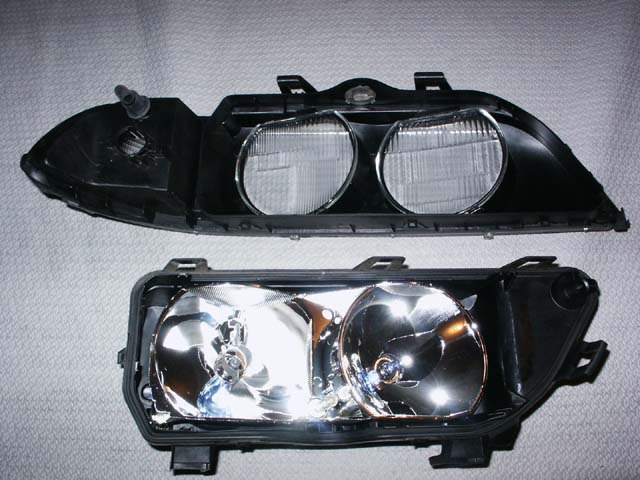
11. Remove the glass lens elements by prying off the metal clips. The clips will possibly be reused, so remove them carefully. Make note of the position of the lenses because they are unique for the low and high-beam. If you intend on converting from Halogen to Xenon HID bulbs, it's important to install the correct Xenon-spec low-beam lenses since they are pattern-matched according to bulb-type.
12. Clean the lenses prior to reinstallation. Don't allow dust or debris to fall into the plastic lenses as they scratch very easily. Blow out any dust prior to installing the lenses.
13. The clear-corner Hella lenses are generally Euro-spec and you'll notice the turn-signal/parking socket might not fit perfectly because one of the arms doesn't latch properly. I simply pushed till one arm hooked and the socket was snug. Another option is to try and modify the hook so the latch fits. Again, pressing too hard might cause one of the arms to snap off. If installing smoked or clear-corner lenses, DOT rules require 3157NA amber bulbs to maintain an amber colored turn-signal.
14. Re-assemble the parts and swing the assembly back in by following Step 5, then Step 4. When re-installing try to match up the serrated marks and washer indents to preserve alignment.
15. Check to see if the assemblies line-up properly. The screw points have some play to allow them to be moved around a bit. Check that all the bulbs work properly and have the head lights professionally aimed.

|
Questions? Comments? E-mail me:
|
 . .
|
Click Here to return to the Main Menu.

Optimized for 800x600 or higher resolution.
Copyright © Midnight Designs, 2002-2003. All Rights Reserved. All
images and registered trademarks are used to benefit and without intent to
infringe on the holder. Contents Subject to Change Without Notice.