BMWdiy.INFO
E39 Seatbelt Click Fix
(SI 72-01-01)
Prepared by VietSB
Contributions by John Taves and FrankM
Modified 07.29.06
NOTE: Perform these steps at your own risk. All P/N's listed are a "best guess", so please double-check with your local dealer. These mods and repairs were performed on my US-spec 1997 540iA (11/96 prod date, M62 engine) but there is no guarantee they will work on other E39's. BMW lists different b-pillar P/N's for different years so I've included alternate instructions for a 2000 model-year E39 which appears the same as a 1999 528i (Euro) I received an e-mail about from FrankM. Both E39's required removal from the bottom first, so proceed carefully. These instructions are provided for entertainment purposes only!
BACKGROUND: I noticed a soft but annoying clicking noise coming from my upper seatbelt anchor. After hearing other complaints regarding the same issue, I researched and found a BMW technical service bulletin (SI 72-01-01) recommending replacement of a spacer on a customer-complaint basis during the BMW New Vehicle Limited Warranty period. Cars built after 01/2001 have the updated part.
My car is out of standard warranty, so I performed the repair myself. Since the seatbelt anchor is a critical safety component, I recommend having a dealer perform the installation, especially if you are under warranty.
Required Parts:
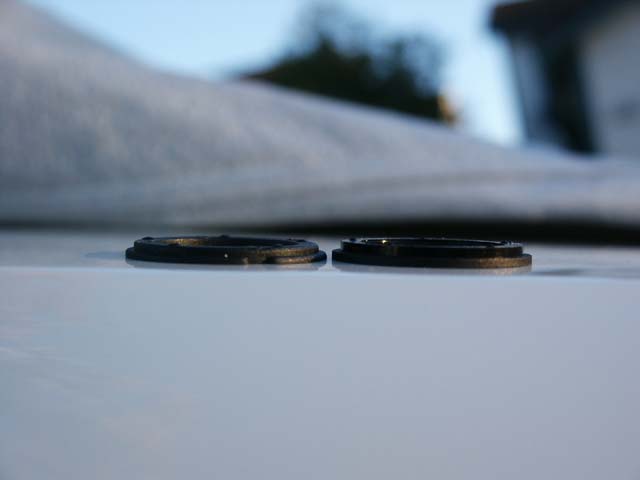
- (Qty 2) P/N 72 11 1 978 983 Updated plastic spacer ring (a few bucks at the dealer)
As you can see by the following pic, there is a definite tolerance difference between the original (left) and updated (right) spacer in both overall height and flange height.
Required Tools:
- 3/8" Torque wrench, 17mm socket
- Door panel puller
If you don't have a 1997 E39 and your b-pillar appears to be firmly attached at the top, try the alternate instructions below for removing the b-pillar from the bottom first.
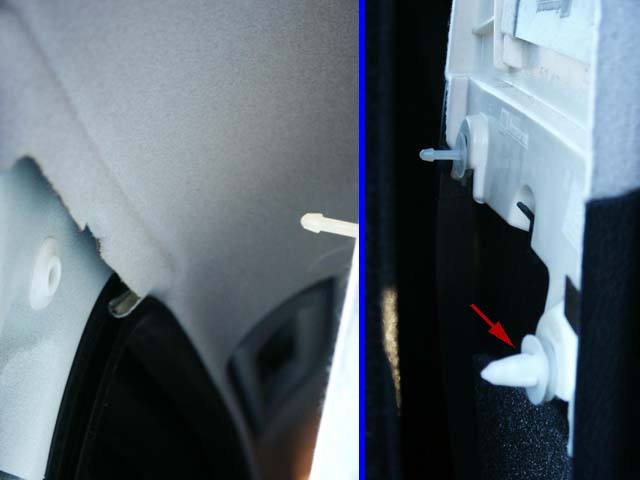
1. Move the seat and seat back to a position where the B-pillar is completely exposed. Pull at the very top of the B-pillar trim panel until the fastener snaps undone (left pic). Pop the 2 fasteners at the middle of the pillar as well (right pic). If the body-side of the fastener comes out (see red arrow), use the door panel puller to separate the pieces.
2. The B-pillar separates into 2 pieces making it easier for access to the belt anchor. Loosen the sleeved-nut using the 17mm socket (see red arrow). Carefully remove the nut and seatbelt anchor. There's a washer behind the anchor which should be left there.

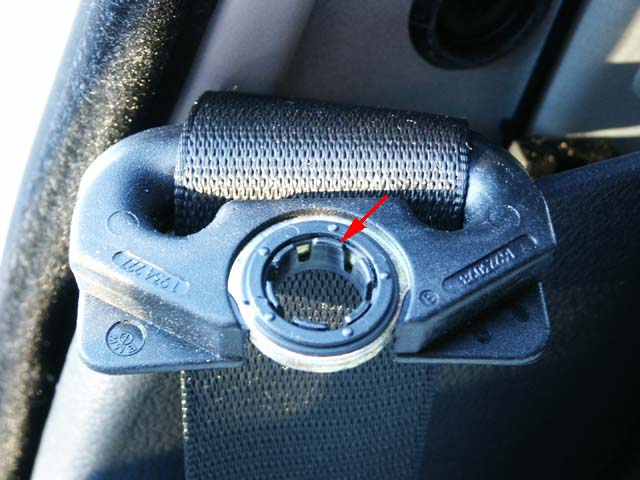
3. Gently pry two or more of the tabs (see red arrow) while applying pressure on the other side of the plastic snap assembly. The two pieces will separate, allowing you to replace the thinner spacer with the updated one. Be sure to position it correctly.
4. Reinstall the seatbelt anchor with the metal washer still behind it and torque the nut to 31Nm.
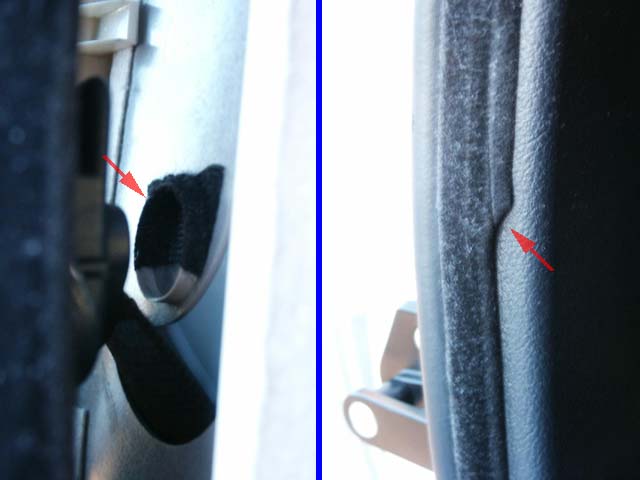
5. Reassemble the B-pillar and line-up the sliding portion of the pillar to the anchor and anchor nut (see left red arrow) before snapping the 3 fasteners back into place. If the seatbelt is difficult to retract or the anchor height doesn't adjust properly when the seat is moved back and forth, most likely the sliding portion is out of alignment. I'm unsure how the door seal was placed against the B-pillar (see right red arrow). I believe it was tucked in for the most part, but I'm wondering where it changes from being tucked-in to tucked-out?
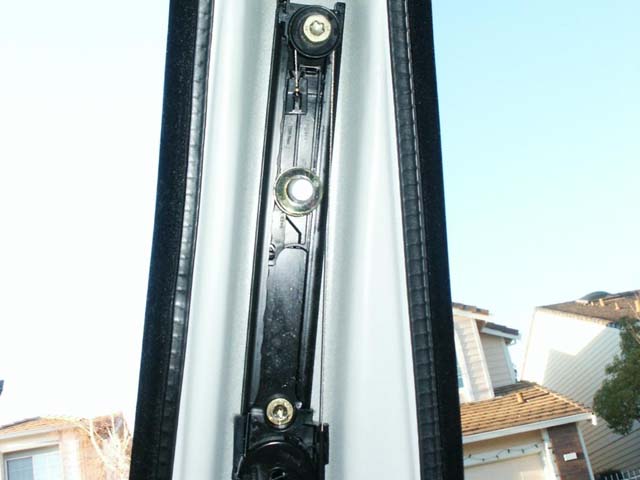
For those that have asked the question, "How do you manually adjust the seatbelt shoulder anchor height?", the answer is "It's completely automatic". When the seat is moved forward or backward, the anchor height automatically adjusts in unison. In the pic below, you can see the height adjustment cable which comes up from the seat.
For 09/00 and possibly later E39's (from John Taves):
"My 2000 seems to have a different attaching mechanism at the top of the top interior trim panel. I tried to pop it out as you described, but I was putting too much force into it. I looked from the side and found that it had a tab and slot design that indicated it should be removed from the bottom.
To remove the top panel, you first remove the bottom panel. There is a plastic 1/4 round trim piece that is carpet colored that covers the carpet and door sill where your feet kick on exiting. Pull the rear seat one from the bottom away from the bottom b-pillar panel, so that you can pull the bottom b-pillar panel out from underneath it. The bottom b-pillar panel will need to be popped out at the bottom, but only the rear part needs to come free. There are two pop fasteners at the bottom. One is close to the rear 1/4 round and one is farther forward. Once you get the rear part of the b-pillar panel out from under the 1/4 round, you can then bend the whole b-pillar bottom panel so that the top part of it comes out from under the top b-pillar panel. Look at what is happening from the rear seat as you try to pry it all free. There are three tabs at the top of the bottom b-pillar panel that need to be freed from the top b-pillar panel, and all of them can potentially break.
Once the bottom panel is freed from the top panel, you can pop the two poppers that hold the bottom of the top b-pillar panel with a screw driver. The top then comes straight down after folding back the black door opening trim."
At this point, continue at Step 2 above.
"To replace the panels, reverse the above, but I suggest placing the bottom and top panels together and then popping the poppers found at the bottom of the top panel in."
|
Questions? Comments? E-mail me:
|
 . .
|
Click Here to return to the Main Menu.

Optimized for 800x600 or higher resolution.
Copyright © Midnight Designs, 2002-2003. All Rights Reserved. All
images and registered trademarks are used to benefit and without intent to
infringe on the holder. Contents Subject to Change Without Notice.